If you have ever been much interested in rearing fishes, then you would possibly know how hard to look after them. There are many people who believe that this job may be pretty simple.
Of course yes, only if you know how to properly set up a canister filter for aquarium.

Canister filters are usually the best option for bigger aquariums when you would prefer not to have many ugly gears inside the fish tank. They are likewise a great choice for big planted aquariums that has carbon dioxide dressing where it is vital to prevent the surface of the water from getting stirred up.
The filter media container system in a canister is highly adaptable to a wide range of media enabling you to customize it to your specific requirements.
A canister filter is an essential gear that you must get in order to keep your fishes happy and healthy. In case you have some extraordinary breed in your fish tank that requires special attention and care, then you need to properly set up a canister filter for aquarium.
With that, we have provided much information you will need to set up a canister filter. So read on and learn!
Table of Contents
What Do You Need to Get Started?
Your filter, it’s accessories, and all your media will all be needed to begin. The exact accessories that accompany your particular canister filter may differ, but generally, you will have the following components:
- Hoses
- Tank connectors
- A motor
- Hose clips
- Hose clamps
- Output assembly
- Intake assembly
- Media baskets or trays
- Filter canister
- Foam inserts
- Ceramic rings
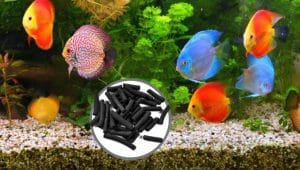
- Activated rings
Canister Filter Installation and Setup Guidelines
In this section, we will give you all the detailed information you need to properly set up a canister filter for aquarium. You need to keep some things in mind.
Diverse canister filters may have different strategies for getting them installed and setup. Notwithstanding, here are sure steps that are generally required for all.
Step 1: Know Your Parts
Take out everything, get the part of your filter listing, ensure that all the required components and accessories for the installation process are on ground.
Your canister filter should accompany everything that is needed to start pumping. In case your canister filter came packaged with media, you should check them to make sure they aren’t damaged and are in good condition for usage.
Step 2: Prepare Your Tank
Locate a decent spot for your canister filter to lay on. Always ensure that your filter is beneath your aquarium for ideal use. The perfect positioning of most canister filters falls between 4 ½ feet and 8 inches underneath the water level of your fish tank.
Check the manual that comes with your filter so as to find yours. You will likewise want to ensure that your aquarium is stacked to its most extreme level and that the hosing can enter directly to your fish tank.
You would prefer not to have any kinks, loops or slack in your tubing, so ensure you examine your tubing before setting up your canister filter in order to be certain that the hose can reach the tank without any issues.
Step 3: Prepare Your Filter
Now, we will begin the process of preparing our media for the filter. Take off the Motorhead of your filter, and ensure that all the media containers are inside.
Contingent upon your canister filter, you may have to fill 3 or 4 media baskets. Gather you most-loved media, categorize them, and prepare to set them up layer by layer.
In case you have any hole in the base of your filter after inserting the baskets, consider fixing the base with some old clay rings so as to diffuse any waste elements that will gather down there.
Step 4: Install Mechanical Media
The mechanical media needs to be set up in your filter’s first tray. The reason being that after your aquarium filter draws water directly from the fish tank, then the water flows from the filter’s first tray and afterward is forced to flow to the other layers, thus getting to be cleaner with each progression.
Mechanical filtration needs to be the initial phase in this procedure, so when water arrives at the chemical and biological stages, the filter media basket there will not get clogged with debris and waste.
Carry your three foam varieties i.e. coarse, fine and extra fine and store them in the filter’s first tray from down to up in that specific order. Each layer will sift through littler and littler particles, setting it up for the next phase in the installation steps.
Step 5: Install Biological Media
You need to include your most-loved biological media to the filter’s second plate right from the base. Some aquarium owners prefer the ceramic rings, while others like the bio-balls.
Some people still prefer utilizing something known as Biohome for most of their filtration requirements and ignore mixing media together.
You may choose to keep your biological media in canister filter sacks but there are a lot of tank owners who simply line their trays along with the biological media component, to no ill impact.
Step 6: Install Chemical Media
Your third and fourth trays (in case you have a fourth tray) are completely free for you to blend things up. You can utilize them for more of the normal media if that is the thing that you feel better with.
You could likewise test, and try including some chemical media to the blend. Activated carbon is a well-known choice, as they are phosphate removers similar to PhosBan.
These media usually come in the form of loose granules, so in case you do include them, utilizing a filter bag is essential. Note: outside of the filter bag, the granules can begin to float, and possibly clog the impeller of your filter.
Step 7: Get the Intake Ready
Now you can get the intake, the filter part that draws water directly from the fish tank, ready. Some canister filters come with a connector that joins to the tank, setting the hoses in place. Attach the connector to the fish tank.
Then connect your hose to the canister filter by extricating the intake clasp, appending the hose directly to the intake valve, then fix the clasp up once more.
Run the hosing to the fish tank, cut your hose to the required length (no loops, no slack), then secure the hosing to the connector. The hose end should be attached to an intake tube that comes down to the tank water.
In case your manual does not give a recommendation on the extent to which the tube should reach out into the water, then you need to go with the 3-inch lead, which recommends that the end of the tube needs to be kept at least 3-inches from the base of your fish tank.
Step 8: Prepare Output
The preparation is similar to that of the intake. Set up the fish tank connector, attach the hose to the canister filter, measure, and cut, then move the hose to the tank.
Ensure you let the output nozzle to rest for at least an inch beneath the water line. It doesn’t need to move all the way to the base of the tank.
Step 9: Begin Your Filter
This can possibly vary from one filter to the other. Generally, however, you will need to check so as to ensure that everything is properly connected, and in the best possible place. Ensure that your valves are open so the canister filter can get access to water and afterward remove water from your fish tank.
There are some filters that require you to have some water in the canister to start, so make sure the necessary amount of water is in the canister before beginning. So when you are sure that everything is prepared, plug in your canister filter.
If the filter has an auto-prime ability, then it will keep running for a bit so as to get the water streaming, then turn it off to force overabundance measures of air from the tank, it will then run ceaselessly until the point when you turn it off.
In case your filter has a priming button, then it may be necessary to pump that a couple of times to make it keep functioning.
Step 10: Watch Your Filter in Operation
Watch your filter in operation for some time, and ensure everything is running properly. Some canister filters may produce some rattling noises when in action.
If these noises continue, however, you might need to check to ensure no trash is blocking any of the filter parts. Watch the rate of flow.
In case it appears to be lower than anticipated, you may need to tighten the connection of the hose, or remove obstacles from your tubing.
Conclusion
We believe you really got a lot of information from this content. By following these easy setup and installation guidelines, a canister filter can give great filtration for aquariums.
Hopefully, you are now more enlightened regarding how to set up a canister filter for aquarium. The directions and guidelines that come with plenty of canister filters are not always the clearest or most straightforward to follow, so it is needful to have a well-ordered guide that can simplify some of the difficult to follow guidelines into simpler terms.


Hi , this is a very useful website and good information for those need to know about aquarium tank.
A lot of good information. I have a 36 gallon tank. I don’t expect to have more than 12 to 15 fish. I’m somewhat confused as to which filtering system is best for my situation. I’m hoping to have live plants or a combination of live and fake. Should I use canister or outside back of the tank type filter? Your thoughts
What is the best way to have a canister filter . Would it be standing on the floor or on a unit above the floor . Help please which way for the best flow of the water .